 Sarasota Siding
 Osprey's Coastal Climate Is Hard on Exterior Siding
Osprey sits along the Gulf Coast in Sarasota County, and that location comes with a specific set of exterior challenges. Homes here deal with hurricane-force winds during tropical systems, wind-driven rain that gets forced sideways into seams and joints, intense UV exposure nearly every day of the year, and a steady dose of salt air rolling in off the water. Any one of those factors will wear down a mediocre siding job. Together, they will find every weak point in a siding system within a few years — loose fasteners, cracked caulk joints, faded paint, swollen panel edges, and hidden moisture behind the cladding.
That combination is exactly why siding selection and installation quality matter more in Osprey than they do in a drier, calmer climate. A product and installation method that performs fine in a mild inland region can fail early here. This page covers what fiber cement siding needs to hold up on an Osprey home, what a correct installation actually involves, and why we've standardized on one manufacturer instead of offering a menu of options.
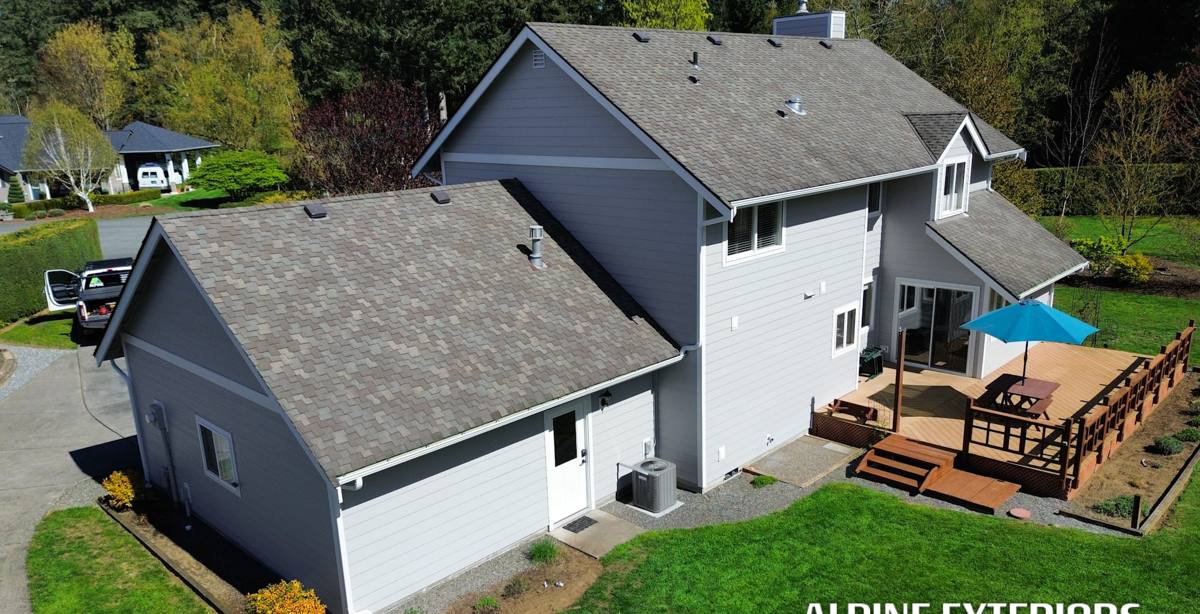
What "Correct" Fiber Cement Installation Actually Means
Fiber cement is a durable material, but it is not forgiving of shortcuts. Most of the siding failures we get called out to inspect trace back to installation mistakes, not the product itself. In a coastal wind and rain environment, those mistakes show up faster.
Fastening and Clearances
Fiber cement plank has to be fastened according to the manufacturer's specifications for the local wind zone — nail placement, nail type, and spacing all matter for wind uplift resistance. Boards also need proper clearance from the ground, roof lines, decks, and other flatwork. Too little clearance traps moisture against the bottom edge of the siding and accelerates deterioration, even with a water-resistant material.
Flashing and Water Management
Every penetration — windows, doors, hose bibs, light fixtures, vents — needs correctly lapped flashing so water sheds outward instead of tracking behind the siding. Wind-driven rain, which Osprey gets during almost every tropical system and plenty of ordinary summer storms, will find any gap in the flashing detail and push water behind the cladding rather than letting it run down the surface.
Joints, Caulking, and Expansion
Butt joints and trim transitions need the right gap and the right sealant, applied so the assembly can expand and contract with temperature swings without cracking open. A joint that's caulked wrong will fail within a season or two in Florida's heat, opening a path for water intrusion that's often invisible from the ground.
Why We Install Only James Hardie Fiber Cement
We get asked why we don't offer vinyl, LP SmartSide, primed wood, cedar, or other fiber cement brands as options. It's a fair question, and the honest answer is that we made a standard, not a sales pitch.
- Vinyl siding is inexpensive and easy to install, but it's a thin plastic product that can soften, warp, or crack under sustained high heat and direct sun — conditions Osprey has in abundance. It also isn't rated to stand up to the wind speeds this coastline can see in a serious storm the way engineered fiber cement is.
- LP SmartSide is an engineered wood product with a resin-treated strand core. It performs reasonably in drier climates, but wood-based siding is more sensitive to sustained moisture exposure than fiber cement, and cut edges need diligent sealing to avoid swelling — a maintenance demand that's harder to keep up with in a humid, rain-heavy coastal environment.
- Primed spruce and cedar are traditional and attractive, but natural wood requires the most upkeep of any siding option — regular repainting, moisture monitoring, and pest vigilance — and it is combustible, which some homeowners weigh heavily given how dry brush fires and lightning strikes can start structure fires even in a humid state.
- Other fiber cement brands use similar cement-composite formulas, but not all of them back their product with the same factory finish warranty or offer product lines engineered specifically for high-humidity, high-UV climate zones.
James Hardie is non-combustible, engineered specifically for climate zones like ours, backed by a factory-applied finish warranty, and has a long track record on Gulf Coast homes. We'd rather install one product correctly and stand behind it than install several products and manage inconsistent expectations.
Matching the Right Hardie Product to an Osprey Home
James Hardie engineers its siding by climate zone, and Osprey falls in the HZ5 zone — the specification built for hot, humid, storm-exposed regions like the Gulf Coast. Within that engineering standard, there are a few product profiles to choose from depending on the look and the home:
- HardiePlank lap siding — the most common choice, available in several plank widths and surface textures (smooth or cedarmill), giving a traditional horizontal siding look.
- HardiePanel vertical siding — used for a board-and-batten look or as an accent on gables and porch areas.
- HardieShingle siding — a shingle profile for homes going for a coastal or cottage aesthetic.
- Trim boards — matched fiber cement trim at corners, windows, and fascia so the whole exterior system is consistent in material and durability, not just the field siding.
The right choice depends on the home's architectural style, the condition of the existing substrate, and the homeowner's maintenance preferences. We walk through those options during the estimate rather than defaulting to one product for every house.
ColorPlus Factory Finish vs. Field-Applied Paint
One of the most practical decisions on a Hardie project is whether to choose a ColorPlus factory finish or have the siding field-painted after installation. Both are legitimate options, but they behave differently over time — which matters in a climate with this much UV exposure.
| Factor | ColorPlus Factory Finish | Field-Applied Paint |
|---|---|---|
| UV fade resistance | Baked-on finish engineered for UV exposure; backed by its own finish warranty | Depends heavily on paint quality and application; fades faster under constant Florida sun |
| Color consistency | Uniform, factory-controlled color and sheen | Can vary with application conditions and number of coats |
| Touch-up needs | Touch-up paint available matched to factory color | Repainting on a recurring schedule to maintain appearance |
| Color selection | Curated Hardie color palette | Any color, including custom or historical matches |
| Upfront cost | Typically built into product cost | Added labor and material cost for painting after install |
For most Osprey homeowners, ColorPlus is the lower-maintenance path because it's engineered specifically to resist the fading and chalking that intense, near-daily sun exposure causes on ordinary paint film. Field painting still has its place when a very specific custom color is required.
Our Installation Process, Start to Finish
A siding job is only as good as the steps nobody sees once it's finished. Here's how we approach a fiber cement installation on an Osprey home:
- Inspection and estimate. We assess the existing siding, look for signs of moisture damage or rot in the sheathing, check window and door flashing, and measure for material.
- Tear-off and substrate check. Old siding comes off and we inspect the sheathing underneath. Any water-damaged wood gets replaced before new siding goes on — covering over a compromised substrate just hides the problem.
- Weather-resistive barrier. A house wrap is installed correctly lapped, shingle-style, so water is directed outward and down, not trapped against the wall assembly.
- Flashing details. Windows, doors, and penetrations get flashed before siding goes over them.
- Siding installation. Panels or planks are installed to Hardie's HZ5 fastening specification, with correct clearances at the ground, roofline, and trim.
- Joint sealing and touch-up. Caulking at butt joints and trim transitions, plus any factory-matched touch-up paint needed at cut edges and fastener heads.
- Cleanup and walkthrough. Site cleanup followed by a walkthrough so the homeowner can see the finished work and ask questions before we consider the job done.
What Fiber Cement Siding Costs to Install in Osprey
Every home is different, but these are the factors that move the price up or down on a fiber cement project. We don't quote a number until we've seen the house, but this table gives an honest sense of what drives cost.
| Cost Factor | Why It Matters |
|---|---|
| Square footage of exterior wall area | The single biggest driver of material and labor cost |
| Tear-off of existing siding | Removing and disposing of old material adds labor beyond a fresh install |
| Sheathing or framing repair | Any hidden water damage found during tear-off needs to be fixed before new siding goes on |
| Product profile | Plank, panel, and shingle profiles have different material and labor requirements |
| Trim and detail work | Homes with more corners, gables, and window trim take more labor per square foot |
| Story height and access | Second-story and steep-roof areas require more time and equipment |
| Finish choice | ColorPlus factory finish versus field-applied paint affects material and labor cost differently |
Be cautious of any bid that's dramatically lower than the others — it usually means shortcuts somewhere in flashing, fastening, or substrate repair, all of which are expensive to fix later once they've caused hidden damage.
Maintenance Checklist to Protect Your Investment
Fiber cement is low-maintenance compared to wood, but "low-maintenance" doesn't mean "no maintenance," especially in a salt-air, high-UV environment. A few habits go a long way:
- Rinse the siding periodically with a garden hose to remove salt residue and airborne grime, especially on sides of the house facing prevailing wind and water.
- Inspect caulk joints at trim and butt joints once a year and re-caulk any that have cracked or pulled away.
- Keep sprinklers and irrigation heads adjusted so they aren't hitting the siding directly and repeatedly.
- Trim back shrubs and landscaping so air can circulate along the base of the wall and moisture doesn't sit against the siding.
- After any major storm, walk the exterior and look for cracked boards, loose fasteners, or displaced trim.
- Touch up any chipped paint at cut edges or fastener heads promptly to keep water from getting into the cut fiber cement.
Why Hiring a Crew That Already Works in Osprey Matters
Siding installation isn't identical everywhere. A crew that mostly works inland, in drier climates, doesn't have the same daily habits around flashing detail, fastener spacing for wind zone, and moisture management that a crew working the Sarasota County coastline builds over time. Local experience also means familiarity with the permitting and inspection process specific to this area, and a realistic understanding of how a home here actually gets tested by weather — not in theory, but from doing the work here repeatedly.
We work on homes throughout Osprey and the surrounding Sarasota County area, and we install one product because we believe in doing one thing correctly rather than offering every option at every price point. If you're planning a siding project and want a straightforward, honest assessment of what your home needs, we're glad to take a look.
If you'd like a free, no-pressure estimate for fiber cement siding on your Osprey home, use the form below to get started — we'll walk the exterior with you and give you a straight answer about what your home needs.